Beyond the Test Kit: A Modern Enthusiast’s Guide to Cycling Planted Aquariums
Stop waiting for ammonia spikes! Learn the professional hobbyist method for cycling a planted aquarium using fertilizer, live plants, and “seasoning” for a bulletproof ecosystem.
If you’ve spent any time scouring the depths of fish-keeping forums, you’ve heard the same “Standard Model” of cycling a thousand times: ammonia spikes, then nitrite spikes, then finally, you see nitrates and perform a massive water change. While that classic nitrogen cycle is a fundamental piece of biology, sticking strictly to that script is actually making life harder for you and your fish—especially if you’re running a planted tank.
In the world of high-level aquarium husbandry, we need to shift our focus away from just “managing toxins” and toward growing life. When you approach a new setup as a holistic ecosystem rather than a chemistry experiment, you’ll find that the process becomes much more stable and way less stressful.
The “Internet Cycle” vs. The Planted Reality
The typical internet advice views the cycle as a linear track:
- Fish Waste (Ammonia)
- Nitrosomonas Bacteria
- Nitrite
- Nitrobacter Bacteria
- Nitrate.
In a sterile tank with plastic plants, this is your only defense. However, in a planted aquarium, we have a shortcut that is arguably much more efficient. Aquatic plants don’t just wait for the bacteria to finish their job; they can physically consume ammonia directly.
When a plant pulls ammonia from the water column to build a new leaf, it bypasses the production of nitrite and nitrate entirely. This is why large-scale water treatment facilities often use “biological engines” like Hornwort, Water Hyacinth, or various floating plants. They aren’t just looking for bacteria; they are using the plants to physically strip the water of nitrogen and heavy metals.
Why “Fertilizer Cycling” is a Game Changer
Most hobbyists choose between “fish-in” cycling (which can be risky) or “fishless” cycling with pure ammonia. I want to suggest a third path that works beautifully for planted tanks: Fertilizer Cycling.
Instead of dosing harsh cleaning ammonia, start by setting up your lights and pumping in a high-quality liquid fertilizer. Here is why this works:
- Proof of Life: If you see a plant grow an inch in a week, or even if you start seeing a bit of green hair algae, you know the tank is processing nitrogen.
- The Algae Buffer: We’ve been conditioned to hate algae, but in a new tank, algae is your best friend. It acts as a safety net, consuming waste while your bacterial colonies are still finding their footing.
- Bacterial Inoculation: When you buy a live plant—especially one in a pot with rockwool—you aren’t just buying a plant. You are bringing in an established colony of beneficial bacteria that was living in the nursery tanks. It’s a two-for-one deal: a mechanical filter (the plant) and a biological starter (the bacteria on the roots).
The “Seasoned” Tank vs. The “Cycled” Tank
There is a massive distinction between a tank that is technically “cycled” and one that is “seasoned.”
A tank can be cycled in two weeks—meaning it can process a specific amount of ammonia into nitrate. But a seasoned tank is an ecosystem that has been stable for six months or more. This is where the magic happens.
- Biofilm and Mulm: Over time, the substrate accumulates “mulm” and surfaces develop a rich biofilm. This isn’t “dirt”; it’s a complex microscopic forest of bacteria and microorganisms.
- Stability: A seasoned tank is “bulletproof.” If a fish dies or you overfeed one day, the established ecosystem absorbs the shock.
- Sensitive Species: Animals like Neocaridina shrimp or Otocinclus often struggle in a “cycled” but unseasoned tank because they rely on 24/7 grazing of biofilm and algae that simply haven’t matured yet.
Practical Steps for Success
If you’re starting a new planted setup, I recommend a gradual “stepping stone” approach to stocking rather than dumping your full list in on day one:
- Phase One (The Green Phase): Plant heavily from the start. Use fertilizers and decent lighting. Wait until you see visible new growth or the first signs of diatoms/algae.
- Phase Two (The Cleaners): Introduce “utility” animals like Amano shrimp or snails. They will begin processing the initial algae blooms while adding a very small, manageable ammonia load.
- Phase Three (Gradual Stocking): When adding your main fish, do it slowly. Feed them once a week at first. The second week, move to twice a week. This gives your plants and bacteria time to “pivot” and scale up their processing power.
Nature’s Most Evolved Filter
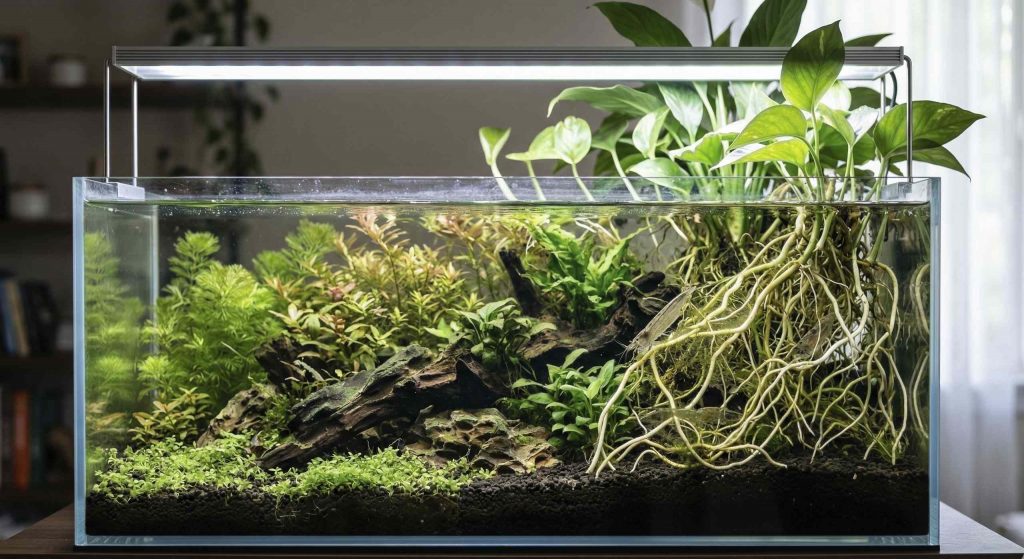
We often rely on expensive canisters and high-tech media to do a job that nature perfected millions of years ago. A healthy stand of Pothos or Bamboo growing out of the top of your tank, with roots submerged, can often outperform a stack of expensive ceramic rings.
Don’t panic if your liquid test kit isn’t showing a “perfect” reading in the first month. Look at the life in the tank. If the plants are thriving and the algae is active, your “biological filter” is working—it just looks like a leaf instead of a sponge.
Utilizing both the technology we’ve built and the biological tools nature provided allows us to create environments that are often more stable than the wild habitats these fish came from. Focus on the growth, stay patient through the “ugly” algae phases, and let your plants do the heavy lifting.
I hope this helps you rethink the way you approach your next setup. Get stuff living and growing first, and the rest will follow naturally.
Pro Tips:
- The Squeeze Method: If you have an established tank, squeeze a dirty filter sponge directly into the new tank’s water. It looks messy for an hour, but it’s the fastest way to “seed” a new biological filter with active bacteria.
- Floating Plant “Sponges”: Use fast-growing floaters like Frogbit or Salvinia during the first 30 days. They have access to atmospheric CO2, allowing them to grow faster and suck up ammonia more aggressively than submerged plants.
- Light Control: During the cycling phase, keep your lights on a strict 6-8 hour timer. This allows enough photosynthesis for the plants to “eat” ammonia without triggering a massive, uncontrollable hair algae breakout.